Tips and tricks from a pumpkin carving master

Go Deeper.
Create an account or log in to save stories.
Like this?
Thanks for liking this story! We have added it to a list of your favorite stories.
Editor’s note: This article was originally published in 2015.
David LaRochelle has a history with pumpkins.
When he was only 11, he grew a handful of the orange orbs and sold them on a street corner in his hometown of New Brighton, Minn.
"I've always loved pumpkins," LaRochelle said. "Every year, I can't get enough."
Turn Up Your Support
MPR News helps you turn down the noise and build shared understanding. Turn up your support for this public resource and keep trusted journalism accessible to all.
Now in his 50s, LaRochelle is a children's book author and illustrator by trade — but every October, pumpkin fever arrives and LaRochelle gets to carving.
He first took carving seriously in the 1980s, when he saw a pumpkin-carving contest on the back of a carving kit at the store. He entered — and he won.
In the decades since, his reputation as a jack-o'-lantern master has continued to grow. He's been asked to carve pumpkins for everything from the Minnesota Timberwolves to an exceptionally crafty wedding. He's had to turn down most requests, though: His carving schedule is packed.

LaRochelle's pumpkin prowess took him all the way to the set of "Good Morning America" a few years ago, when he was on the show for Halloween. He was flown to New York and put up in a chic hotel where he spent the entire night carving pumpkins on the bedside table. The next morning, he walked his creations across Times Square, appeared on national TV and flew right home. The whole thing took less than 24 hours, he said.
Twenty-four hours can be a whole lifespan for a carved pumpkin. LaRochelle's creations usually only last a day or two before starting to rot — though some can last up to a week or more if they're only shaved, not carved.
"It's an ephemeral art," he said. "You know that going into it."
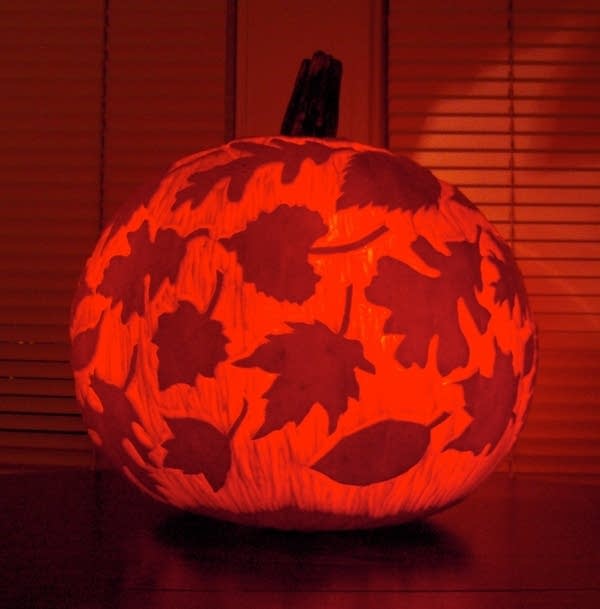
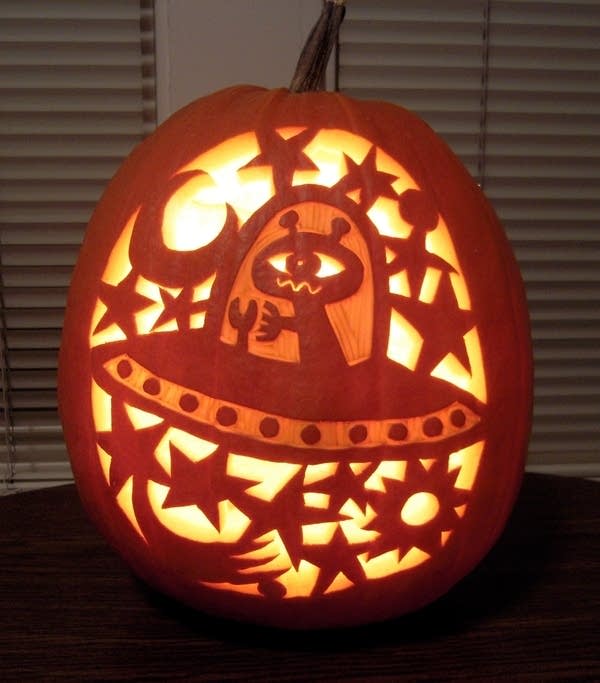
LaRochelle doesn't stick with the standard triangle faces for his pumpkins — he's carved everything from a Scrabble board to a pumpkin parody of Grant Wood's "American Gothic."
This year, LaRochelle is busy carving a special pumpkin for Wild Rumpus, a children's bookstore in south Minneapolis. He'll also carve a few just for fun, which he takes to a friend's house in St. Paul for Halloween.
He's been doing that for years, making the house at 1872 Princeton Ave. something of a Halloween destination for those in the know.

"Some people say they come every year to see the pumpkins," LaRochelle said.
If you're feeling inspired, pick up a pumpkin and try it yourself — LaRochelle shared his carvings tips and tricks just in time for Halloween. And if you're any good at it, you may have just found a new career.
"I tell people: If you're looking for a new career, there is definitely a market for pumpkin carvers out there."
Seasonally, of course.
Carving tips from pumpkin master David LaRochelle

1) Pick the right pumpkin
Give any pumpkin you pick a complete inspection, and check for any soft spots — you don't want a pumpkin that's already started to spoil.
In your hunt, avoid the ridges. Some pumpkins have deep ridges which are fun to look at, but a pain to carve. Go for a pumpkin with a smooth surface instead.
If you have a design in mind already, get the pumpkin to match: Do you need a tall skinny one? Short and round? Big as your head? Scout accordingly.
2) Hollow it out and thin the shell
Carving pumpkins requires some dirty work: You have to get all the seeds and strings out first. LaRochelle recommends using a special scraping tool: A spoon with a serrated edge. "It will clean out a pumpkin quicker and better than your spoon from your kitchen drawer."
Once the pumpkin guts are out, thinning the shell is key.
"Sometimes you'll get pumpkins with really thick shells and it can be difficult to carve any design all the way through that," LaRochelle said. "I scrape the pumpkin shell to anywhere between 3/4 and one inch thick."
3) Draw your design in advance and transfer it
There's nothing wrong with freehand pumpkin carving. If you're feeling inspired, have at it!
But if you're looking for a little more detail, LaRochelle recommends drawing your design out first on tracing paper.
You can then transfer the design using a pin to prick small holes through the paper into the pumpkin, following the lines. Take the tracing paper off, and the outline of your design should marked on the pumpkin.
4) Think outside the triangle face
"Don't be afraid to think creatively," LaRochelle said. "Usually we think of pumpkins as having a face design on them, and that's fine, but you can go beyond that with symbols. Think of bats, snakes, the moon, stars, or even scenes — like a graveyard or a spooky forest."
You can go even farther and leave Halloween behind altogether. "It could even be a rabbit or a puppy."
5) Consider shaving instead of carving

You can create interesting designs without cutting all the way through the pumpkin. Scraping away just enough of the outer shell to let the light glow through opens up new design possibilities.
The ideal tool for scraping the pumpkin shell are linoleum block cutters, LaRochelle said. The cutters have "v"-shaped blades and are available at art supply stores.
6) Be patient
LaRochelle estimates that his pumpkins take between two and four hours to carve. One elaborate design of a coiled snake took more than eight hours. "I'll never do that again," LaRochelle said.
7) Don't try to make your pumpkin perfect
It's easy to get hung up on the details, but LaRochelle said he encourages people not to worry about the perfect carving.
"The lopsidedness of a design can give it more character."
8) Light it up

"I use anywhere between 4 to 8 votive candles per pumpkin," LaRochelle said. "That really makes it glow nice and brightly."
An alternative to candles is Christmas lights, especially the ones that blink, he said.
(Anyone lighting candles this Halloween should remember to be safe and supervise children around open flames.)


